Pushing the light sensitivity
Most of modern day DSLR provides a wide range of ISO option. Ranging from the usual ISO 100, into the super sensitive ISO 1600 or 3200. Pushing camera's light sensitivity with using a very high ISO however, usually resulted in a too grainy photos. While it might look artsy for B&W pictures, it is not so stunning for food shots.The maximum ISO with acceptable grain for a food shot differs with each camera models. My Samsung NX 300 for example, despite its impressive maximum ISO 25600, can only take good details and acceptable noise for food shots until ISO 800.
 |
| A glass of Kombucha and steak sandwich shot with ISO 800. Can you notice the fine grains on photo's the lower part? |
Long exposure food photos
To keep your photos sharp when shooting handheld, the venerable rule of 1/FL (FL is 35mm-format FOV) applies. It means if you are using a 50mm lens, the minimum speed to shot is 1/50 seconds, or 1/60 seconds ("60" on camera) rounded to the nearest camera option.Unless there's a specific result you want to create using a slower shutter speed, stay above 60 to minimize movement shake. Old masters like Ansel Adams even suggested that the slowest speed to take sharp handheld photos are 1/5FL, Meaning the slowest speed for 50mm lens are 1/250 seconds ("250" on camera).
While it still challenging, long exposure is actually a working solution to take food shots in dark environment, all you need to do is to find a steady and tall enough object for your camera to rest upon. I usually uses bottles with lighter cameras, or tall glass with heavier cameras. Not much of a perspective choices, but you get the job done.
 |
| Tuna Steak shot from on top of a tall glass, further enhanced during editing to adjust the lighting. |
Using flashlight for food photos
While using flashlight is an obvious solution, however on a public dining flashlight is as annoying as it is on a ballet performance. Its light is blinding, distracting, thus it might destroy whatever ambience the other dinner guests are trying to have. Therefore a flashlight is another no-no.Using camera plus cellphone combo for food photography
A cellphone in this case, will not be used for photo taking, but as a floodlight; you need one with LED lights surely, meaning most modern cellphones.Different with common LED torch flashlights, camera's LED lights are usually on the warm end of the white (daylight white), to provide a natural tone for human skin. Also, a cellphone will most probably a tool every foodbloggers already have, so you don't need to invest in another photography gear.
While some of today's cellphone already have good enough camera, like iPhones and high-end Android phones, using it alone will result in a flat washed out photos as the photo subject will be lighted with direct lighting in a same direction with the camera's.
Using a combination of a camera and cellphone, you are free to move the light source around to control the subject's illumination as you pleased. Move it closer to the subject to create strong shadows, far from it for softer shadows. Highlight only a specific area of the food, create dramatic contrasts, all is possible with this combo.
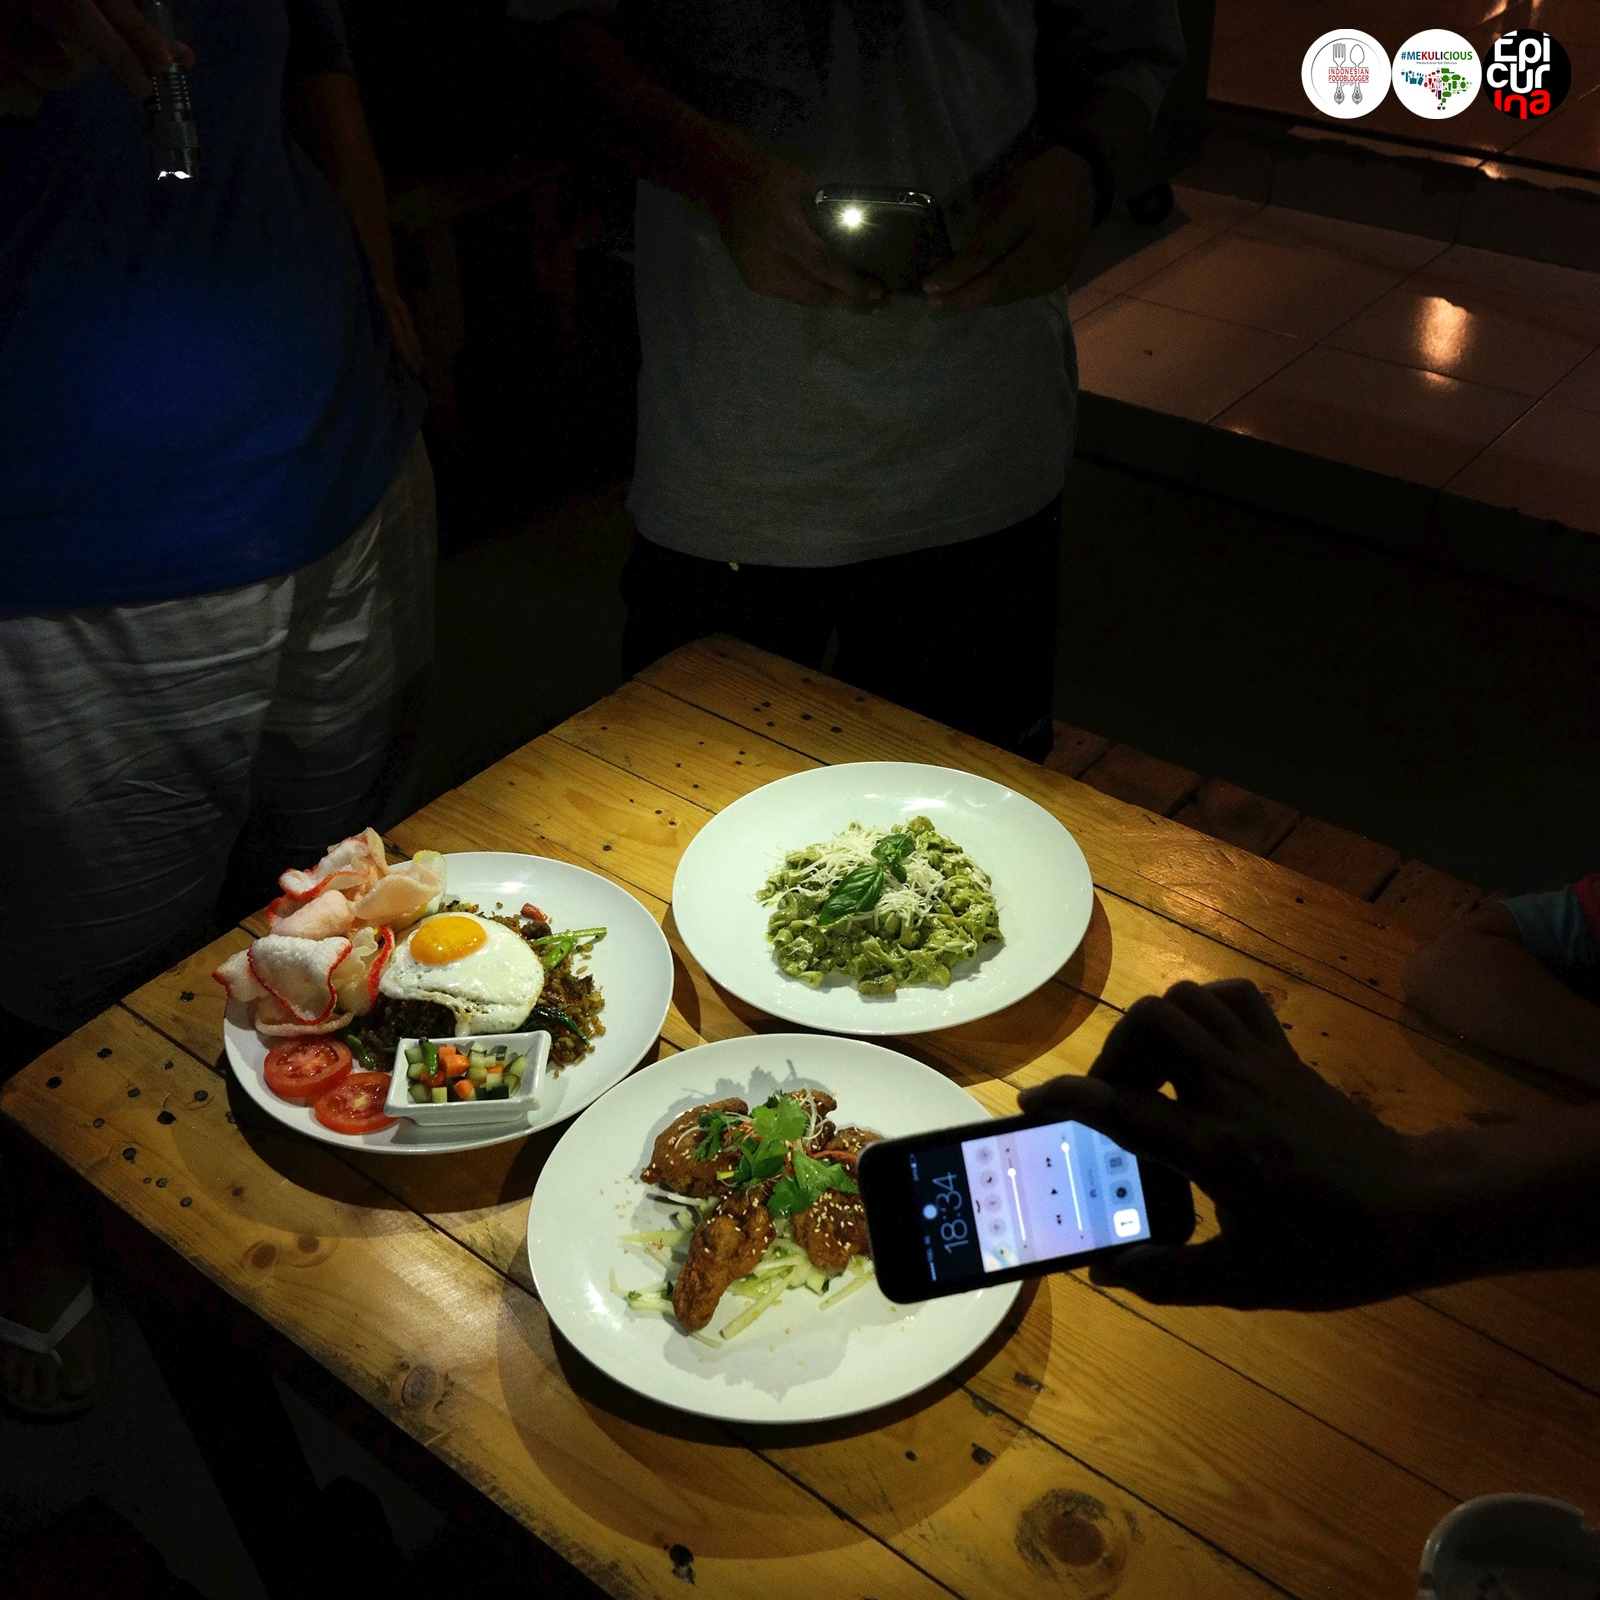 |
| Night shooting using three additional light sources: two from cellphone, one from LED torch. |
Last but not least, photo editing
While the result might not be as pleasing as studio shots, there are already some digital photo manipulation tools capable to perfecting, thus leashing out the best of your photographs. My favourite apps is Photoscape on PC (freeware), since it has good preset features that could enhance your photo quality, as well as some cosmetic modification like creating frames, adding texts, etc.For a heavier editing duty, especially when you shoot in RAW format, consider using the bigger guns like Adobe Lightroom.

These photos are taken using Panasonic Lumix FH7 + HTC Salsa combo, post-edited using Photoscape.
A reminder: documentation not photo session
Keep in mind though, that the purpose of your food shots during dinner invitations is basically to document the event (and shares them later in your food blog). For a proper food photography work, arrange a private session with the restaurant owner where you can shots during the daylight and bring along a more serious tool -- not during dinner invitations! Proper food photography takes time, and proper condition. Besides not everyone sharing the dinner table with you would appreciate it if you don't stand between them and their food.The other acceptable workout should you are unable to take good food photos at all is to ask your host for their own food photos, since most established eateries usually already have those for press release, media relations, publications, and are taken by professional photographers. Just don't forget to give correct photo credits.
Any other tips you want to share? Leave it on the comments below. (byms)


0 comments:
Post a Comment